So, you’ve completed a trial flying lesson (if not, check out these affordable introductory flying lessons!) and have caught the aviation bug! But what happens next? How will the your ongoing training work? And more importantly – how can you maximise the expenditure of your hard earned cash?
In this article I’ll talk you through what to expect from a pilot’s licence course and pass on my own tips and tricks to get the best value for money!
The Pilot’s Licence Course
Course Structure
Phase 1: Basic Flying Manoeuvres
- Aircraft Familiarisation
- Pre & Post Flight
- Air Experience
- Effects of Controls
- Ground Taxiing
- Straight & Level Flight
- Climbing
- Descending
- Turning
- Stalling & Slow Flight
- Spin Avoidance
Phase 2: Takeoff & Landing
- Takeoff
- Landing
- First Solo
Phase 3: Navigation
- Advanced Turning
- Forced Landing Without Power
- Forced Landing With Power
- Navigation
- Instrument Appreciation
After completing your trial lesson, you’ll hopefully have decided which license is best suited to you, planned your budget and have booked in for your next lesson.
Further lessons follow the tried and tested “brief, fly, debrief” format. Each lesson fits into an overall course structure, consisting of nineteen numbered exercises (some exercises will take several lessons to complete), which can be broadly categorized into three phases (see Course Structure). The lessons will be taught in rough numerical order, although a good instructor will adapt the choice of lesson to the weather conditions, and teach out of sequence if necessary.
In the first (and arguably most important!) phase, your instructor show you how complete pre-flight checks, and teach you the basic flying techniques used to control an aircraft. Time spent here building good flying habits will pay dividends later on, so don’t be frustrated if it seems to take a while! It’s absolutely essential to learn top notch basic flying skills before progressing.
In the second phase, you’ll be taught how to take off and land (termed circuit training, as you’ll circuit around the airfield, landing and then taking off again with each pass). Hopefully, during your previous lessons your instructor has been explaining the relevant techniques as you took off and landed, so you’ll already be familiar with the relevant procedures and techniques.
You’ll need to employ all the skills learnt during the first phase to control the aircraft accurately in the circuit, whilst also learning how to gracefully reunite the aircraft with terra firma. It’s therefore essential that the basic skills are completely understood and well-practised, as you simply will not have time in the circuit to relearn or brush up on them. Don’t ever skimp on the first phase people – the circuit can be a very busy place.
 Most students find that their rate of progress seems to plateau during their attempts to nail that perfect landing. Don’t worry – this is normal! Your instructor will gently coach you until it all seems to suddenly fall into place. At that point, you’ll be mildly surprised to find you’ve just been sent off on your first ever solo flight – traditionally one circuit of the airfield, culminating in a fantastic landing. This will be followed by celebrations, handshakes, photos, smiles and a suave “well done” nod from your instructor.
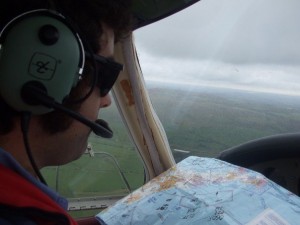
The final phase will teach you how to apply phases one and two in order to navigate to other airfields. Since any pilot who claims they’ve never been lost is a liar, you’ll also be shown what to do when you do get lost! You’ll also practise emergency drills that could be needed away from the airfield, such as actions taken upon accidentally flying into cloud, and how to make off-airfield landings (if necessary). During this phase, you’ll graduate to solo flights away from your home airfield, then to solo landaways at other nearby airfields.
Ground Exams
- Air Law
- Operational Procedures
- Human Performance
- Meteorology
- Navigation
- Flight Performance and Planning
- Principles of Flight
- Aircraft General Knowledge
- Radio Telephony
After a few revision lessons, your instructor will then deem you ready for a skills test and pair you with an Examiner. You should have now completed all nine ground exams prior to test – hopefully, your instructor encouraged you to crack on with these throughout your training! Don’t let the fact there are nine ground exams put you off; most take less than half an hour, and are multiple choice (see Ground Exams).
The skills test incorporates basic flying exercises, emergency drills, navigation, and a number of different circuit exercises. The exact test standards and content can be found in the test “bible”, (Civil Aviation Authority Standards Document 19), which you should definitely make yourself familiar with!
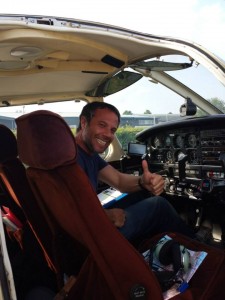 Test nerves are common – it’s fair to say that most aspirant pilots suffer from some degree of test anxiety. Your examiner however will do their best to put candidates at ease; contrary to popular belief, they’d actually prefer a student to pass! It’s worth remembering that examiners are looking for safe pilots above all else. You don’t need to fly to superhuman levels of accuracy in order to pass; and examiners are aware and forgiving of the fact that sometimes, humans do make mistakes.
Once you’ve landed, your examiner will debrief you on your test, and hopefully inform you that you’re the world’s newest pilot. After a few celebratory beverages, you’ll be able to send off your license application to the CAA, and prepare to spread your newly minted wings. Enjoy – and safe aviating!
My Top Tips To Save Money On Your Flight Training
Proper Prior Preparation Prevents Poor Pilot Progress.
Or – to put it another way – studying before a lesson will save you cash! Every student should possess a flight exercise textbook, which describes every lesson and its technical background in detail. This is ideally studied prior to every lesson in order to get maximum value from your training – you’re likely to learn faster armed with a deeper understanding of the exercise to be flown.
Stick With The Same Instructor.
Wherever possible, try to have lessons with the same instructor. Whilst everything is taught to a standard lesson plan, different instructors have different styles; if you change instructors too often, you’ll spend extra time getting used to different methods.

Pair Up.
Find another student who is at the same stage of training as you, and (aircraft type permitting) observe each other’s lessons from the backseat. You’ll be amazed how much you gain from observing each other fly when you’re not occupied with flying the aircraft yourself.
Fly Often.
Try to schedule your lessons as close to each other as possible; flying skills fade over time. You’ll save money if you don’t have to spend half your lesson relearning the last flight from a month ago. Obviously your budget will dictate how feasible this is, but honesty I’d recommend a gap of no more than one week if at all possible. That said, don’t worry too much if weekly lessons are more than you can manage – just make sure you keep up your revision and prepare well for every lesson!
That’s really all there is to it! Now, go forth and fly!
Do you have any helpful tips to pass on to other pilots-in-training? Let us know in the comments below!
